
Fabric quilting with embroidery machine
News from Stickbaer
The idea for my embroidery file "Quilted Fabrics" was not mine, but one of my longest-standing test embroiderers, the dear Cornelia from Zwergenwelt Blumenkinder.
Cornelia wanted quilted fabrics from me, or rather, the matching embroidery file to quilt fabrics in different sizes and patterns. And because I found the idea so ingenious, now you all have something of it ;-)
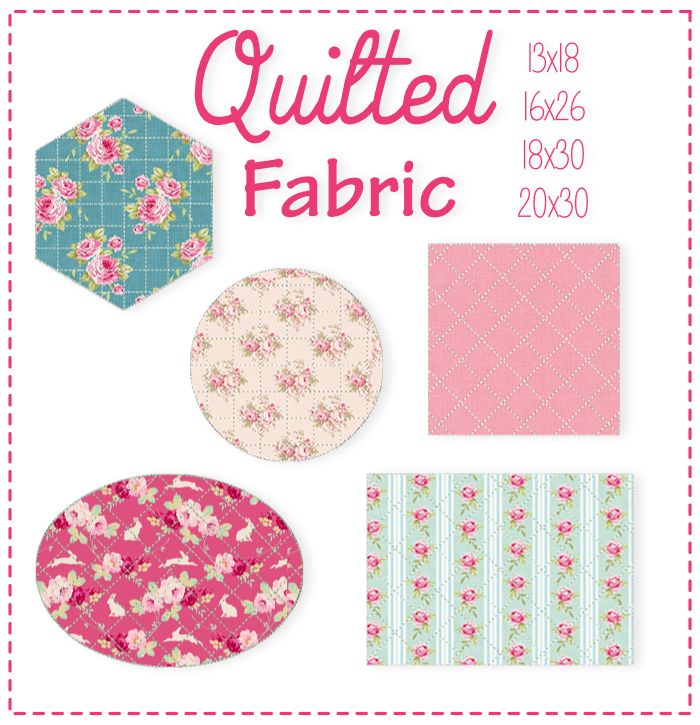
This is where the bear, er... the embroidery machine, is, because you can quilt squares, rectangles, circles, ovals and hexagons in small, absolutely perfect diamond and check patterns with the embroidery file "Quilted Fabrics".
It's best to stitch in the volume stabilizer as well, then you'll have a quilted fabric in no time.
And so that you are spoiled for choice, you can embroider the whole thing in 4 different sizes.
It's best to clamp the volume fleece with it, then you have a quilting fabric in no time.
And so that you are spoiled for choice, you can embroider the whole thing in 4 different sizes.
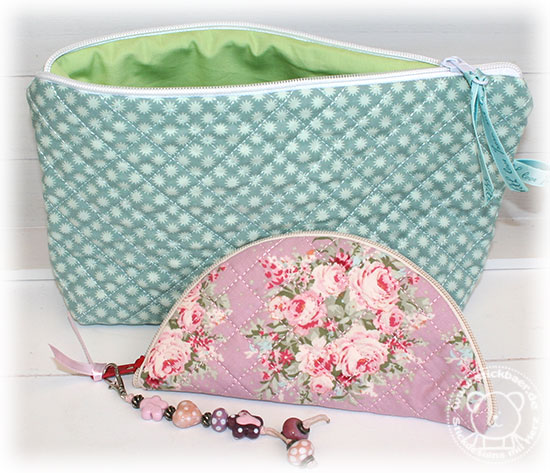
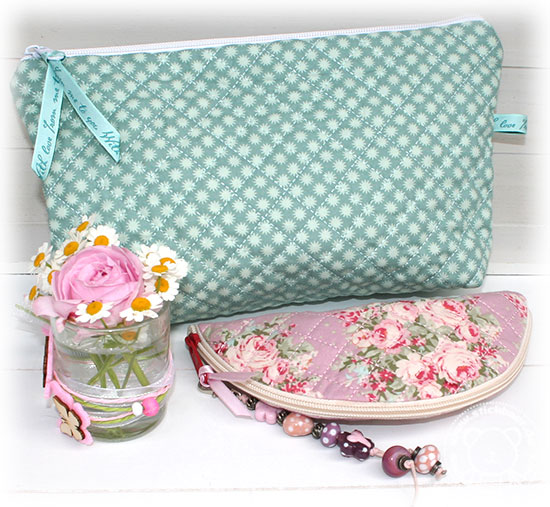
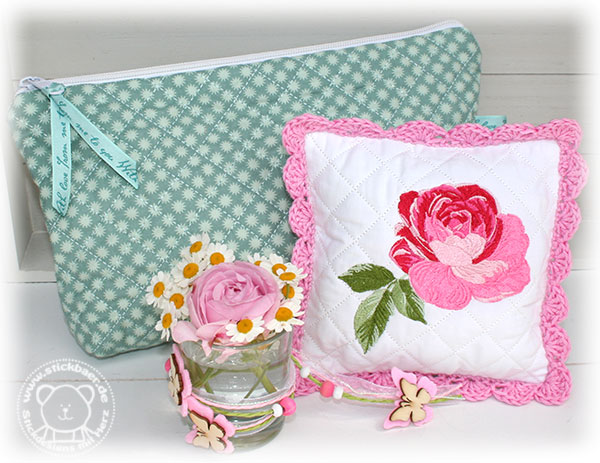
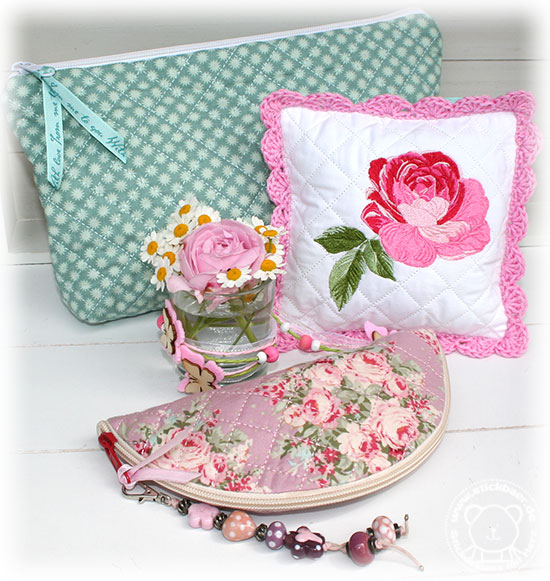
The finished quilted pieces can then be processed into anything.
For example, I have sewn 2 cosmetic bags from it.
And if you like them and you also want to sew them, you can find the two instructions for them here.
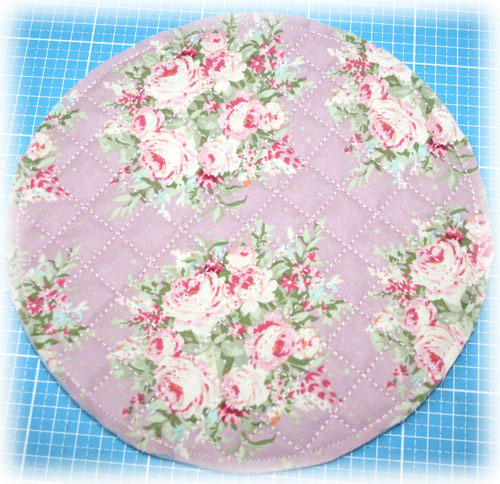
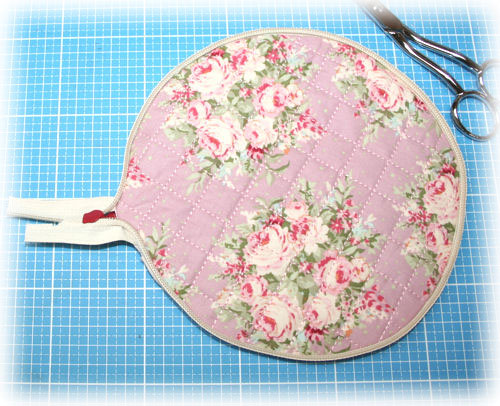
First, the semicircular pocket:
First embroider the embroidery file with the circle. I used a soft embroidery stabilizer for cutting, which can remain in the fabric, it is tear-resistant. This saves me the futzing out of the many small pieces of embroidery fleece between the diamonds ;-)
Over the embroidery stabilizer I put 5 mm thick volume stabilizer and on top of it the rose fabric, all together then stretched in the embroidery hoop and let the embroidery machine embroider.
After embroidering you cut out the circle with 5 mm seam allowance.
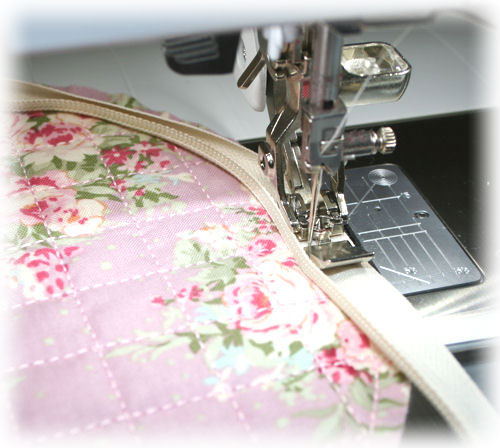
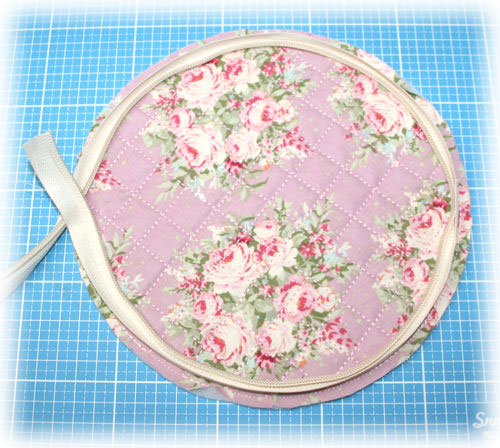
Now take a divisible zipper, which must be about 12 cm longer than the circumference of the circle and divide it apart. Place it on the edge with the teeth facing in and down on the outer fabric. Topstitch it with the zipper foot.
This is how it looks then.
Cut a circle of lining fabric that has the same dimensions as the quilted circle.
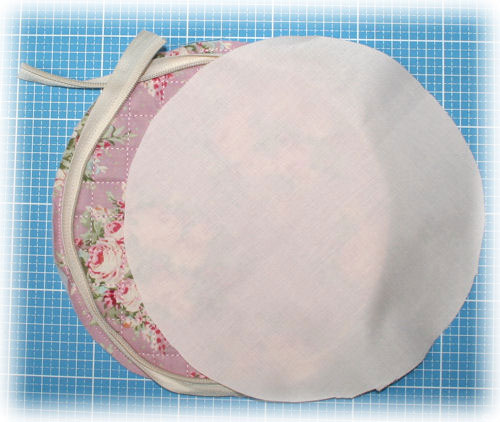
Place the lining circle right sides together on the circle with the zipper, and tuck the loose ends of the zipper inside.
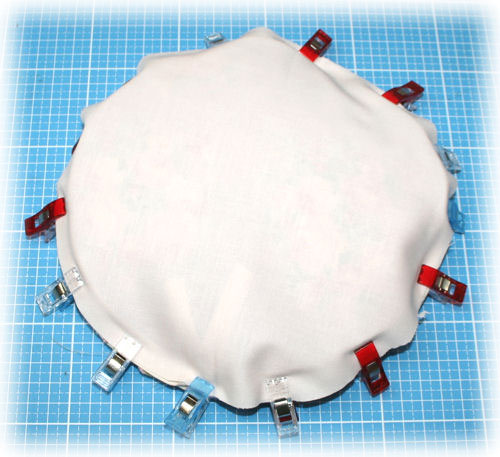
Baste everything with pins or Wonderclips.
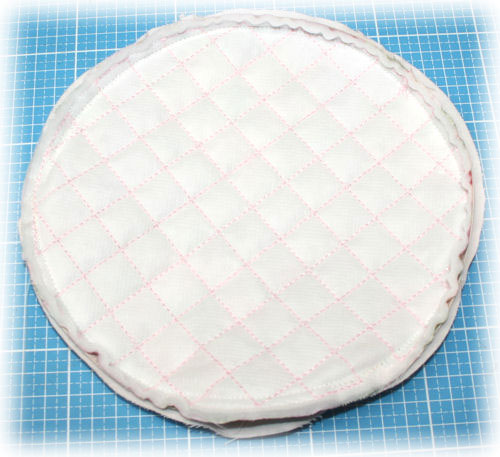
Now sew from the back (with the quilting) exactly on the previously sewn seam.
But leave about 6 cm open for turning.
Turn everything over and get out the loose ends of the zipper. Close the turn opening with a few stitches.
Now thread the zipper. It's a little tricky, but you'll get there!

This is how the whole thing looks now.
The zipper points to the lining side of the bag
So that the loose zipper end is bordered, now cut a piece of fabric about 3x8 cm and iron the narrow sides.
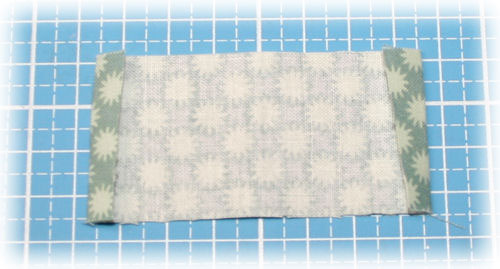
Fold fabric right sides together and sew open sides closed left and right. Turn, press and slide over the zipper ends.
Secure the whole thing with a seam.

This is how it should look like now.
Now turn the bag inside out (the secured zipper disappears inside) and you're done :-)
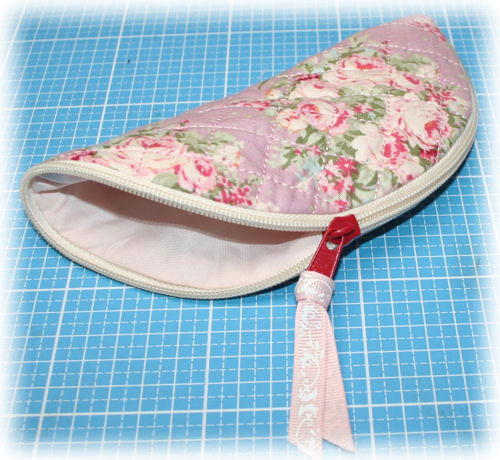
Of course, you can still decorate the zipper.

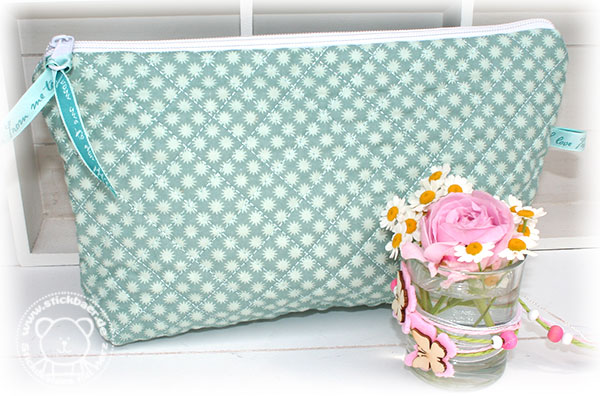
The other bag I sewed from 2 quilted rectangles. I used the 20x30 file, but of course you can use the 13x18 file and all other sizes as well.
So first embroider the two rectangles exactly as described above for the circle. You will be amazed at how fast this goes.
Take one rectangle as a pattern and cut 2 equally large pieces of lining fabric.
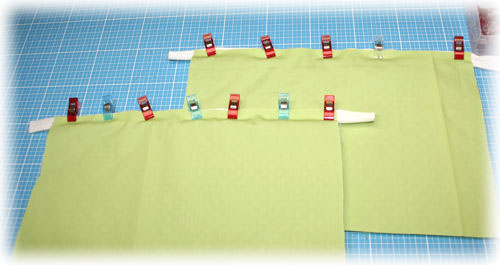
You will also need a zipper, which must be 10 cm longer than the long side of the rectangles, and a zipper.
Divide the zipper and place it on the quilting fabric with the teeth facing down.
Put the lining fabric right on top and fix everything with pins or Wonderclips.

Sew the 3 layers together, topstitching as close to the zipper teeth as possible.
Pull apart and iron.
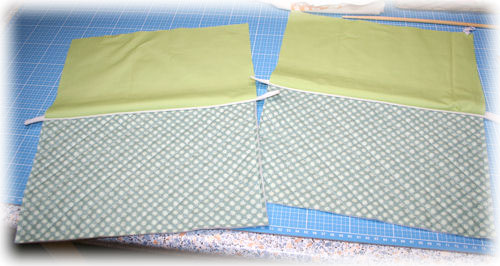
Threads the zipper now....
...and close it the first third.
Now unfold the sandwiches of lining, zipper and top fabric and lay it on top of each other so that the quilted top fabrics and the lining fabrics are exactly on top of each other.
Secure everything with Wonderclips or pins.
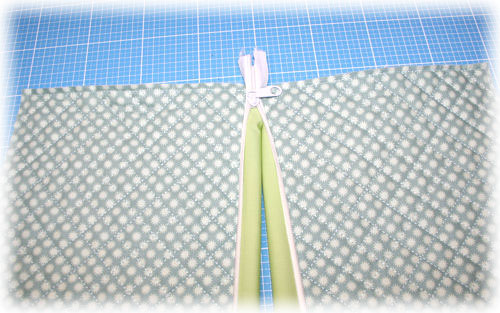
Now sew once all around, but leave an approx. 8 cm long turning opening in the lining.
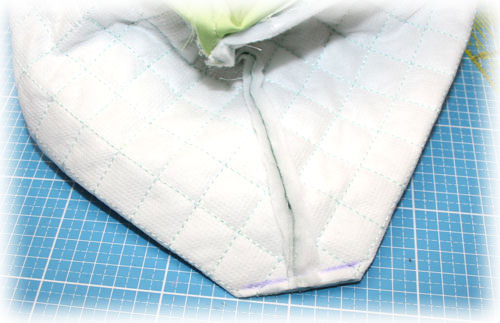
Pull the bag apart, but do not turn yet.
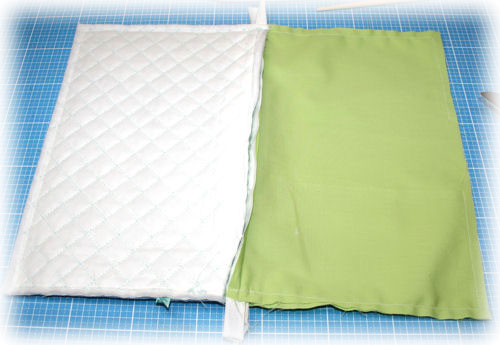
Now topstitch all 4 corners for more stability. Draw a line about 2 cm from the top and topstitch it.
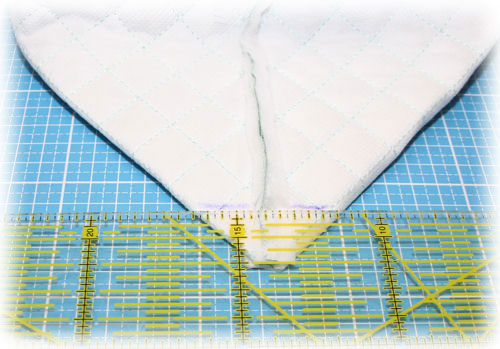
Cut the rest of the fabric.
This is how you do it on the upper fabric corners and the lining fabric corners.
Now you can turn the bag. Close the turning opening in the lining fabric and attach a ribbon to the zipper if you want.
And you have 2 perfectly quilted bags!
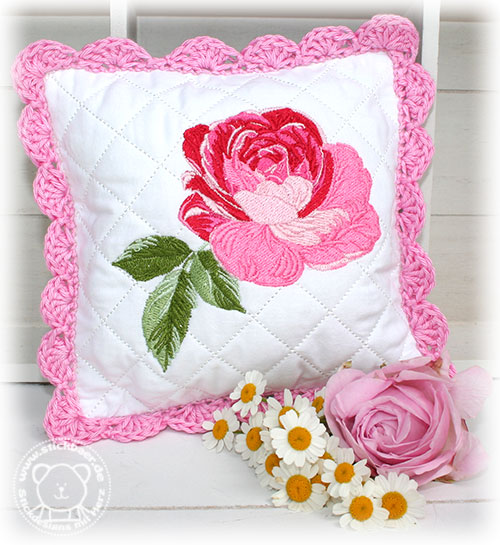
You can of course additionally embroider the quilted fabrics with one of our embroidery files.
Our rose from "Rose et Lavande" fits perfectly to it.
I am curious what ideas you have for our new embroidery file.
Once again, many thanks to Cornelia for the brilliant idea :-)
I wish you all a great weekend.
Kind regards
Tatjana

| Tatjana is the creative soul of Stickbär. She often fills her doodle pad with ideas that she later turns into reality. Because she has so many good ideas, it is obvious that she wants to share her creativity with others. |
Related products


