Der Stickbaer - Made from Heart
Immediate Download of Embroidery files
Pay with Credit Card, Paypal and more

How to embroider an appliqué with the embroidery machine


In this post I will show you how easy it is to embroider an appliqué with your embroidery machine. Maybe you haven't dared to try this simple and great technique yet. 

What makes appliqué so great are at least 2 things:

  1. By covering large areas with beautiful fabrics, you can significantly reduce your embroidery time.
  2. But what makes appliqué so wonderful is the fact that the appliqué fabrics are part of the embroidery design, so it is very easy to influence the look of the embroidery by the choice of fabric.

In embroidery, there are several ways to border the fabric. In addition to the satin stitch, the edges can also be attached with a simple straight stitch. Overhanging edges are allowed to fray a little. This gives such "open-edged appliqués" their special charm.

Kissen mit Tasse appliziert

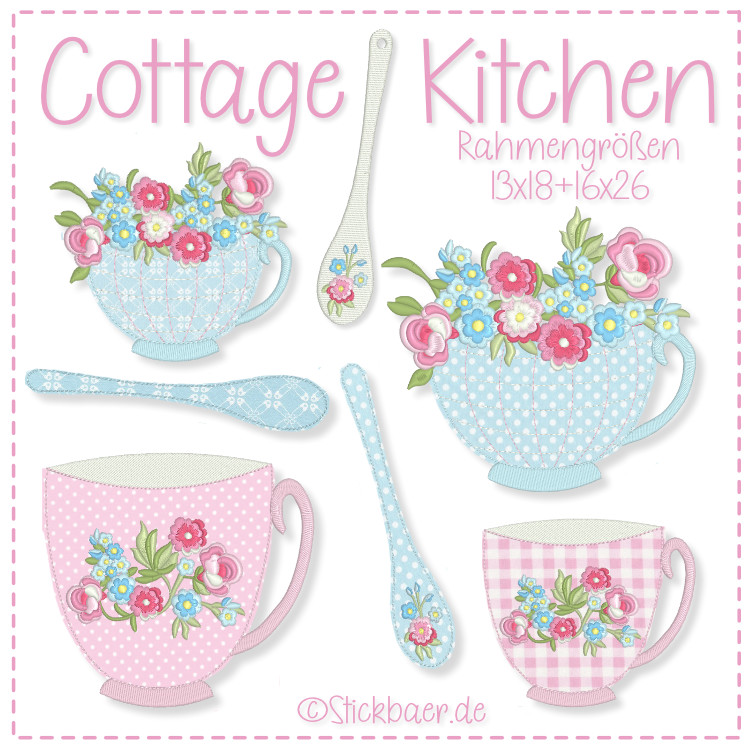
Using the example of the light blue flower cup from our embroidery file "Cottage Kitchen", I will show you how easy it is to embroider such an appliqué.

Stickmotive der Datei Cottage Kitchen

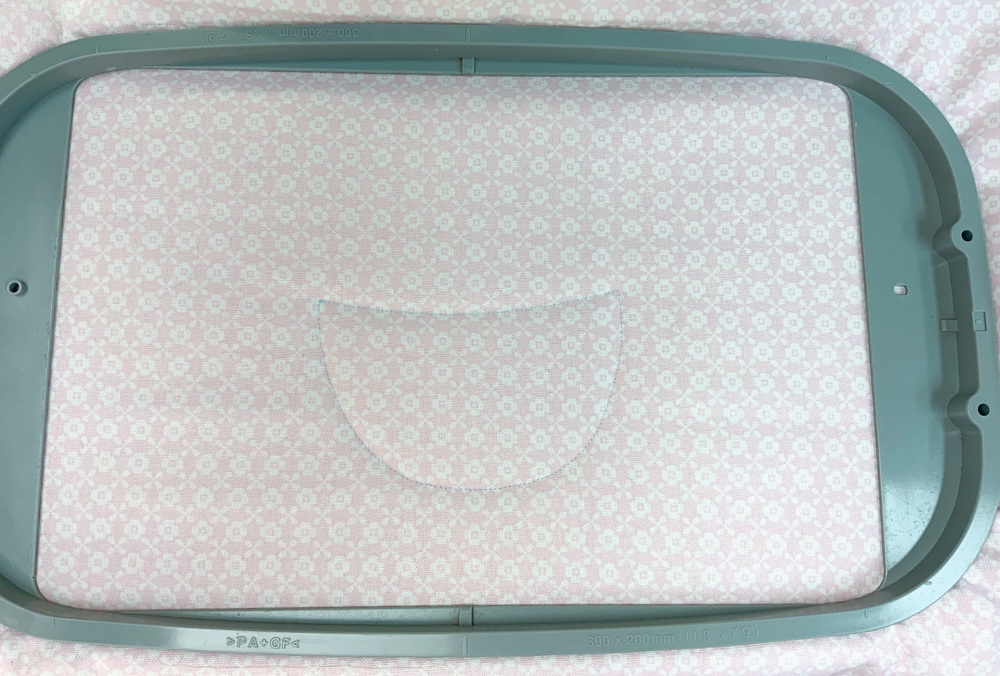
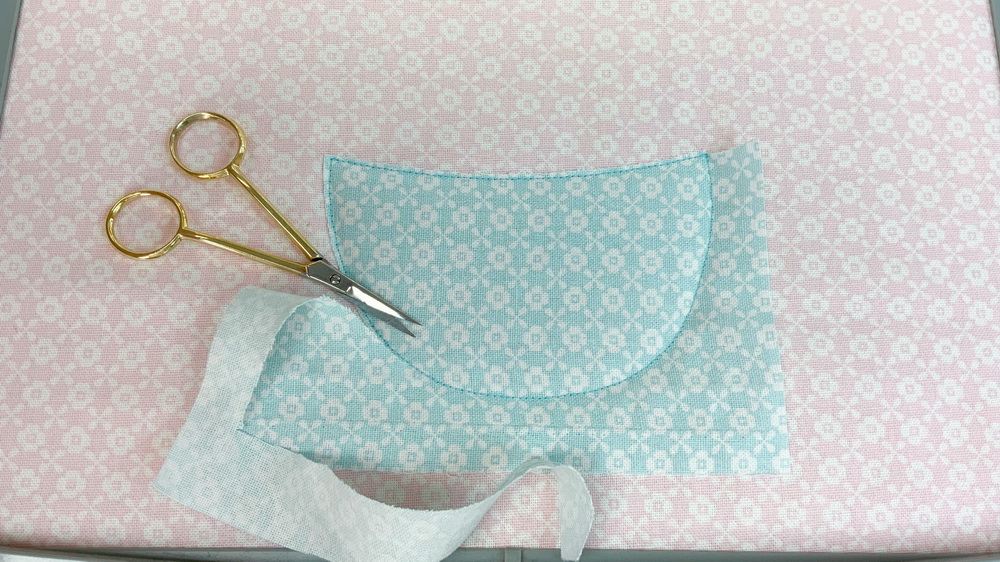
First, as with any embroidery file, hoop the stabiliser and the fabric to be embroidered.

Stoff in Stickrahmen eingespannt

And off you go: Embroider the first sequence, a simple border in the shape of the cup.

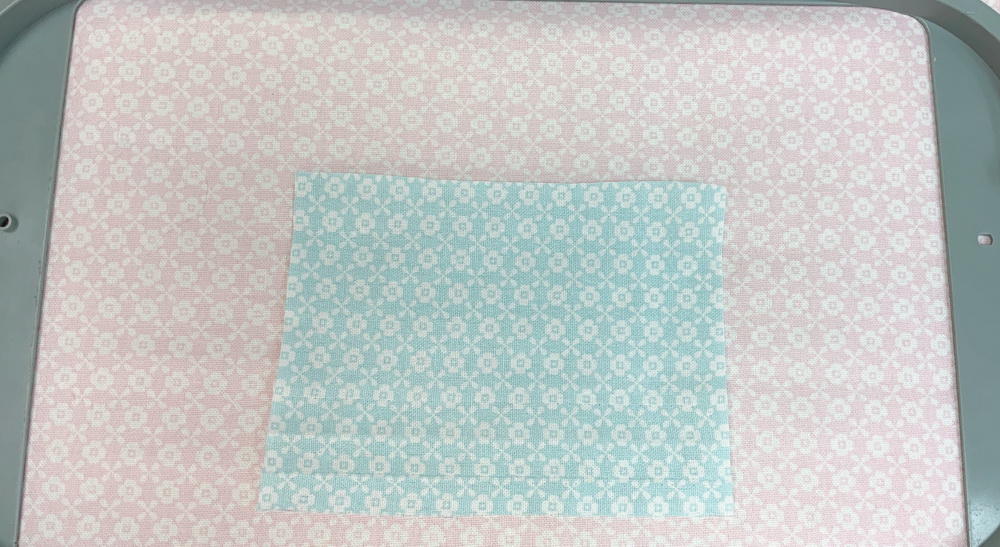
This is where the fabric will be later.

To do this, place the fabric you have chosen for the cup very generously on the previously embroidered border.

By generous, I mean that the fabric should overlap the embroidered line by at least 1-2 cm in all places. Iron the fabric first so that it lies flat. I generally prefer to use cotton fabrics for appliqués. They lie nice and flat and don't warp.

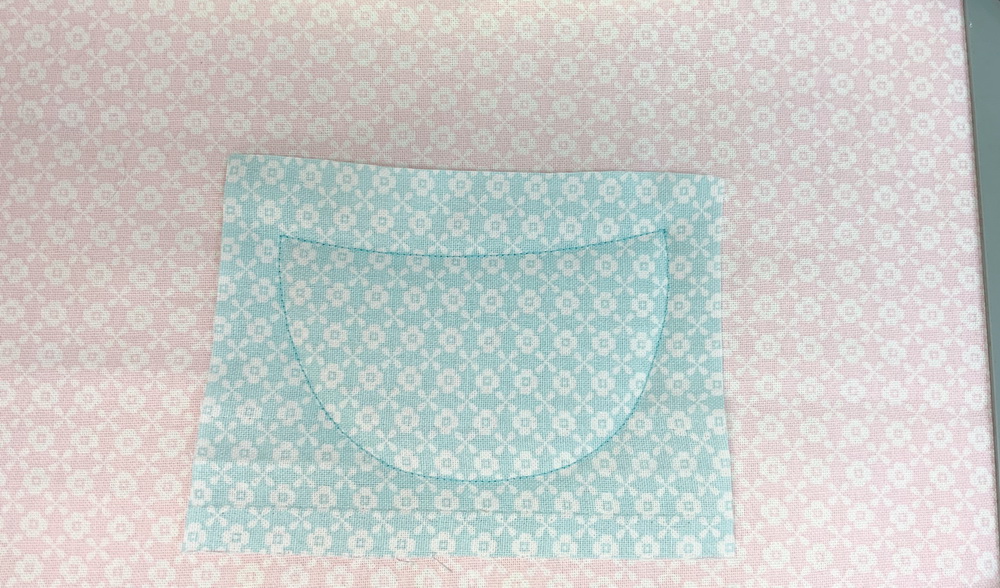
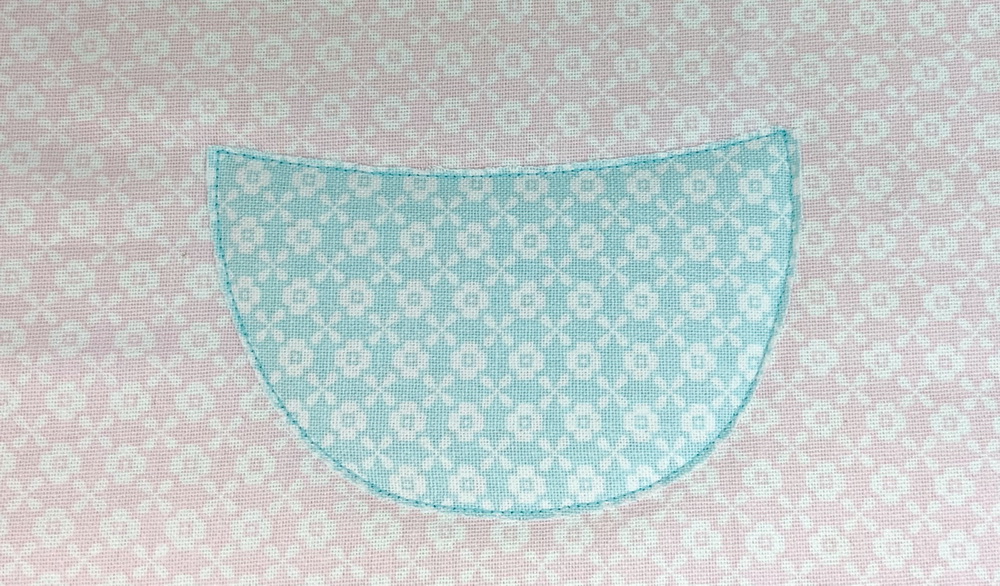
Now the fabric is stitched in place with the next embroidery sequence. Basically, the embroidery machine does exactly the same thing again, attaching the appliqué to the hooped fabric.

A tip on embroidery thread colours: To make sure the embroidery machine always stops in time to hoop the fabric, cut back the fabric, etc., I have given each of the appliqué steps in the embroidery file a different colour.

Of course, it is not necessary to change the embroidery thread each time. Just use the same thread for the whole appliqué, preferably one that matches the colour of the appliqué fabric.

The applied fabric now needs to be cut back. There are special appliqué scissors, but they are quite large. I find that small curved embroidery scissors are perfect for cutting away the excess fabric neatly.

Because the flower cup is an open-edged appliqué, the excess fabric is not cut all the way back to the seam, but is left at about 1 to 2 mm.

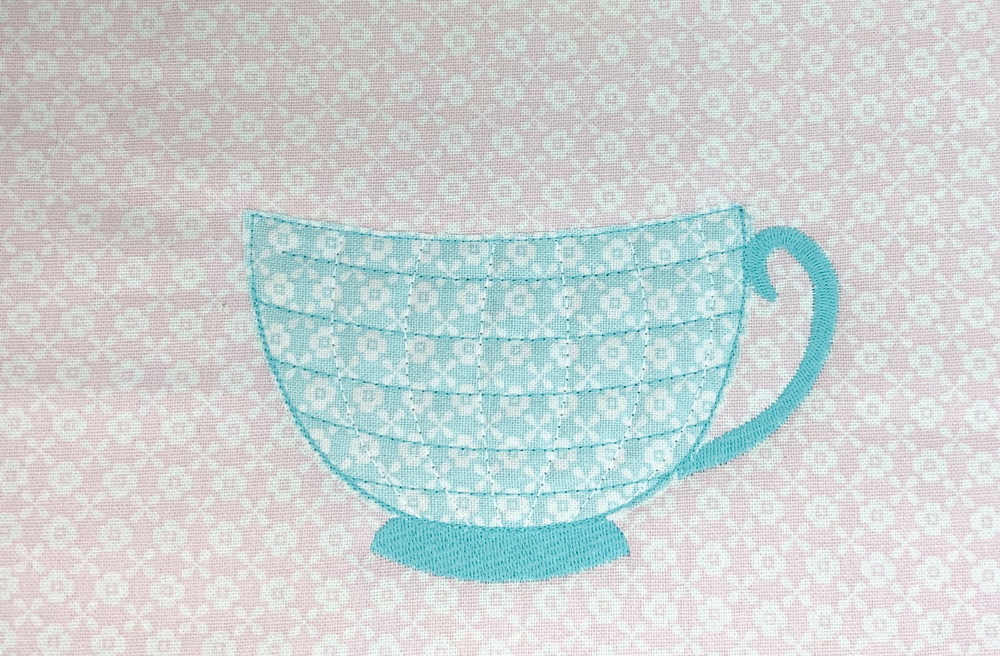
And that's it for the appliqué, the rest is embroidered as usual.

In the case of the cup, this means that the handle and base are embroidered first, in the same colour as the appliqué stitches.

Finally, the whole appliqué is rounded with a slightly thicker straight stitch. This gives the fabric a bit of stability around the edge and looks nice too.

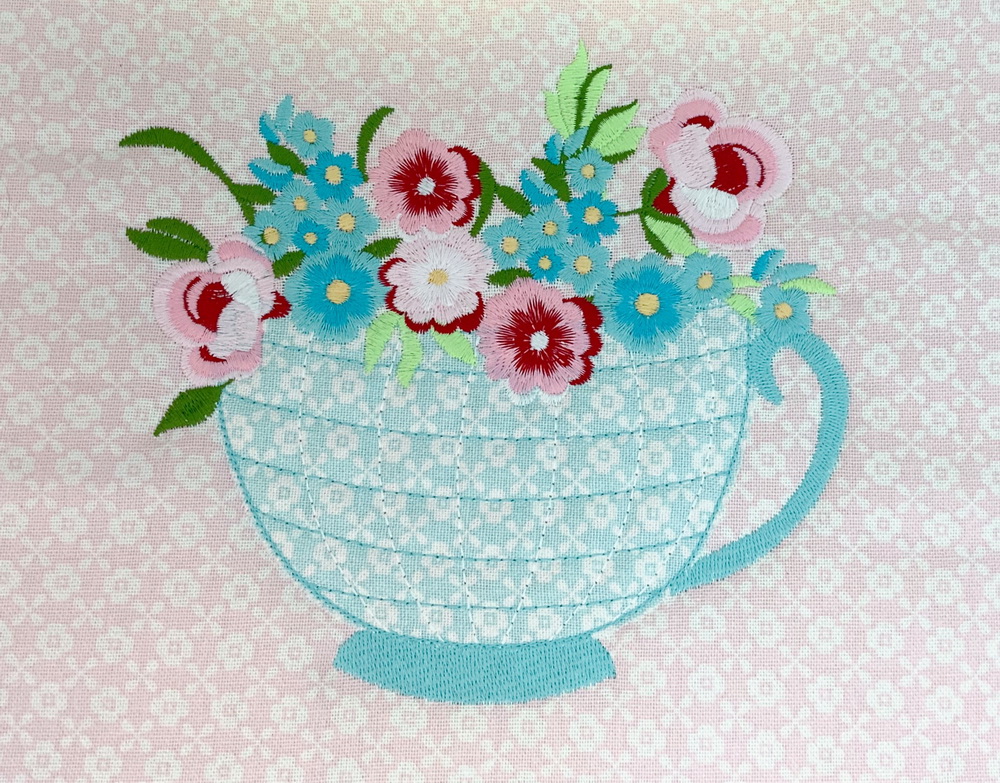
And now for the most beautiful part of the embroidery. Want to watch the flowers grow?

The flower cup is ready to be embroidered. I love watching the embroidery machine stitch petal by petal.

For this type of embroidery and generally all my cottage embroidery files I prefer to use the Frosted Matt from Madeira. It's not glossy and gives the flowers a really great matte look).

I used the embroidered fabric to make a cushion for our bench. The fabrics are tea towels, by the way, and there are so many wonderful designs you can mix and match that I love using them.

Fertig besticktes Kissen

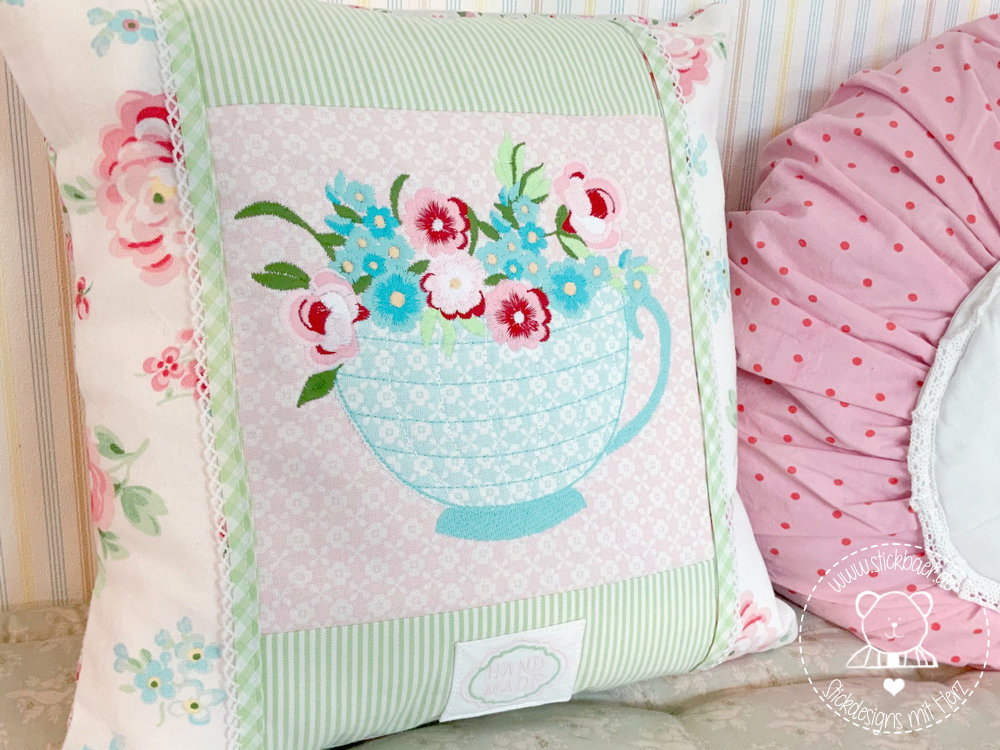
I added a small label to the bottom of the cushion to give it a professional look.

The label is also very easy to make with this embroidery file:

I hope you have fun trying out our new embroidery file and open-edge appliqué.

Your

Author: Tatjana
Tatjana
Tatjana is the creative soul of Stickbär. She often fills her doodle pad with ideas that she later turns into reality. Because she has so many good ideas, it is obvious that she wants to share her creativity with others.  

Related products

Bunny Mom
Hoop size  6x10" or 7x12" With this embroidery file you can embroider and sew an enchanting mummy bunny in 2 sizes. She's wearing a really pretty dress and of course she's wearing underpants underneath. All the tedious fiddling like copying and transferring the paper cut and sewing the mini parts is no longer necessary with this file, because the embroidery machine does all of this for you. After filling with fiberfill, the individual parts of the bunny are only joined together with hand stitches. Of course, all these steps are explained in detail in the 14-page instructions. The upper part of the dress is worked on the embroidery machine, the skirt part is then only sewn on, it's very easy. The sweet underpants are almost completely embroidered with the embroidery machine. The smaller bunny mom for the 16x26 hoop is 41 cm (16“)  tall. The bunny mom for the 18x30 embroidery hoop is 47 cm (18 ½“) tall, measured without ears. You will receive the following files: Little Bunny Mom 6x10" hoop: embroidery file body parts, embroidery file for the pants, embroidery file and sewing instructions for the skirt Big Bunny Mom7x12" hoop: embroidery file body parts, embroidery file for the pants, embroidery file and sewing instructions for the skirt  Pleace enjoy our design examples.  You will need: embroidery and hand embroidery thread cotton fabrics for body ans clothes poly fill tear away stabilizer small ribbon (30 cm/12")

€9.00*
Tiny Shabby Handmade Labels
Hoop size 4x4" (10x10 cm) With our embroidery file  you embroider in a little time your own romantic labels for all your projects just with the right fabrics.  The handmade labels are each approx. 3x5 cm (so much smaller than the large 5x7cm Shabby Handmade Labels). Simply sew them on with your sewing machine after embroidering.  As an example they look beautiful on sewn cloth utensils or crochet baskets. You only need some cotton fabric leftovers, thread, stabilizer and Vliesofix. You will receive 6 embroidery files for 6 different labels and you need a 10x10cm embroidery hoop for this file. Of course the file comes with a detailed embroidery instruction in German and English. How they will look when finished, what the real size is and a lot of samples by our testers can be found here.  You will need: thread 40 WT tear-away stabilyzer different cotton fabrics, unicolor Vliesofix/Bondaweb

€7.90*
Shabby Handmade Labels
Hoop size 4x4" (10x10 cm) With our embroidery file  you embroider in a little time your own romantic labels for all your projects just with the right fabrics.  The handmade labels are each approx. 5x7 cm and, with their romantic roses, frames and letters, go perfectly with our Shabby Mugrugs. Simply sew them on with your sewing machine after embroidering.  As an example they look beautiful on sewn cloth utensils or crochet baskets. You only need some cotton fabric leftovers, thread, stabilizer and Vliesofix. You will receive 6 embroidery files for 6 different labels and you need a 10x10cm embroidery hoop for this file. Of course the file comes with a detailed embroidery instruction in German and English. How they will look when finished, what the real size is and a lot of samples by our testers can be found here. You will need: thread 40 WT tear-away stabilyzer different cotton fabrics, unicolor Vliesofix/Bondaweb

€7.90*
Cottage Kitchen
Hoop size 13x18 and 16x26 Enter the cottage kitchen and be enchanted by a colourful world of cups and spoons with beautiful flowers and shabby charm.  The cups are appliquéd with beautiful fabrics and then embroidered with beautiful flowers. Of course, your embroidery machine will do it all for you. All you have to do is choose the colour of the fabrics. See our blog post to see how to embroider the flower cup as an appliqué. The embroidery collection includes 2 different cups, each in 3 hoop sizes (10x10, 13x18 and 16x26cm, 4x4", 5x7" and 6x16") and 3 different spoons, each in 2 sizes. The spoons are also embroidered with colourful flowers to match the cups. You can choose between fully embroidered and appliquéd spoons. A spoon with fabric appliqué only, without flowers, is also included. Use your favourite fabrics. In total you will receive 12 different embroidery designs (6 cups and 6 spoons). Take a look at the design examples of our testers here. Watch our embroidery machine stitch the flower cup:

€9.90*